Enable Spam Challenge
1. Login to your admin dashboard
2. Under System Admin > System Settings > Click Security Tab
3. Tick the site offline checkbox to enable the offline mode for maintenance
4. Save
Enable Registration Code
1. Login to your admin dashboard
2. Under System Admin > System Settings > Click Security Tab
3. Tick Enable Registration code checkbox
4. Enter your code
5. Save

1. Login to your admin dashboard
2. Under System Admin > System Settings > Click Security Tab
3. Tick Enable reCapcha checkbox
4. Enter reCapcha Public Key
5. Enter reCapcha Private Key
6. Save
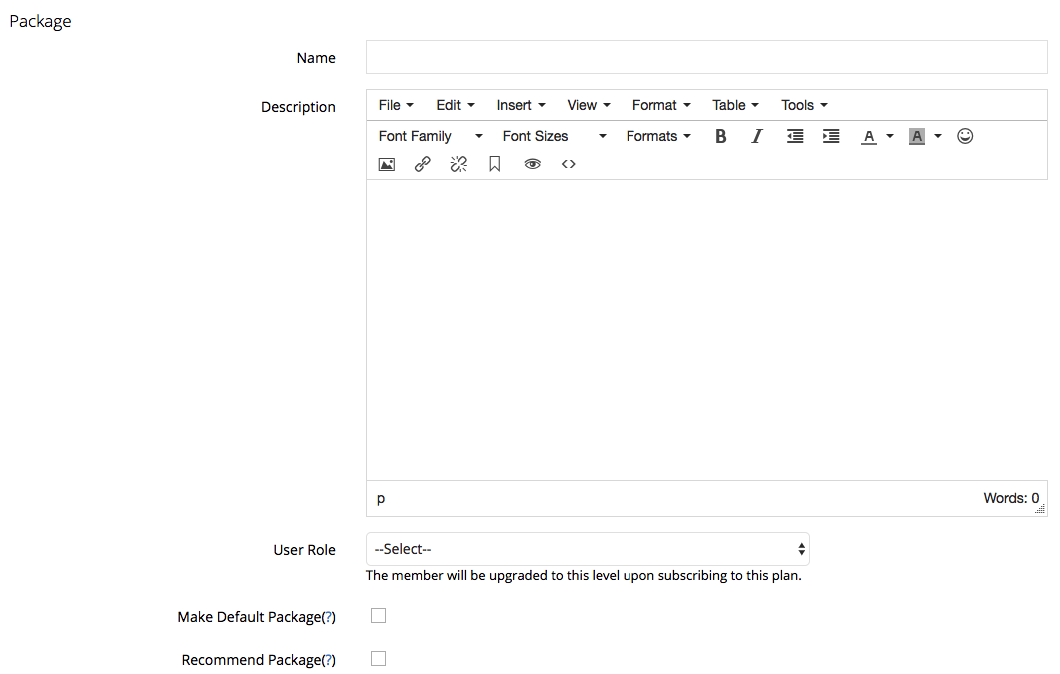
Create a Subscription Package
1. Log in to the admin dashboard
2. Goto System Admin > Subscription > Manage Package
3. Click Create New Package
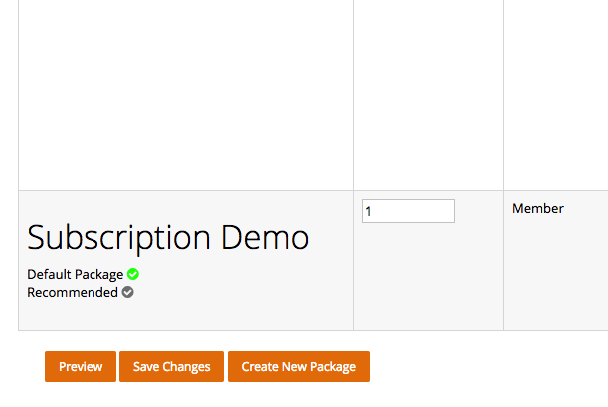
4. Enter Your Package Detail include: Name, Description, User Role (Assign user role to specific package), Make it default and Make It Recommended checkbox.

Create a Plan for a Package
One-time Plan Type
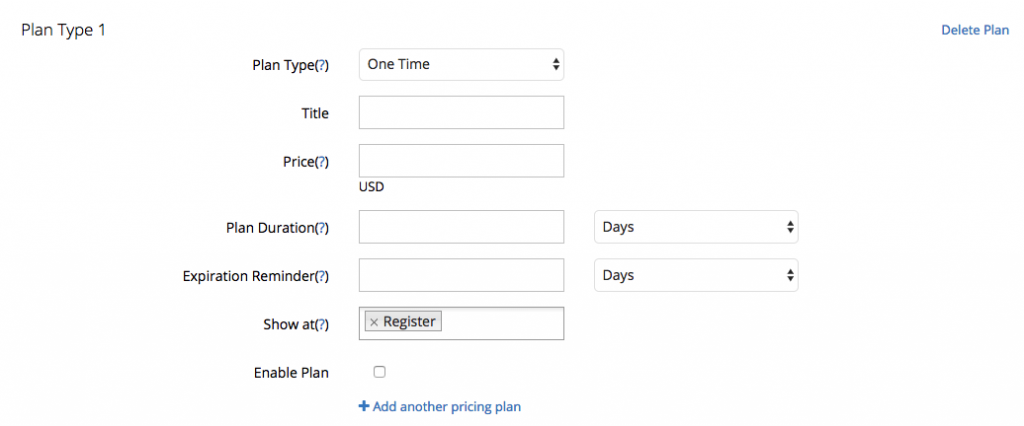
1. Select One-time for plan type
2. Enter Plan Title
3. Enter Your Plan Price
4. Enter Your Plan duration for the plan like 1 year, 6 months…
5. Enter Your Expiration Reminder (Remind user when their plan is about to expire)
6. Enter Show at
+ Registration: Show this plan on the sign-up page
+ Membership Page: Show this plan on the membership page
7. Enable Plan: tick/untick to enable/disable plan
Recurring Plan Type
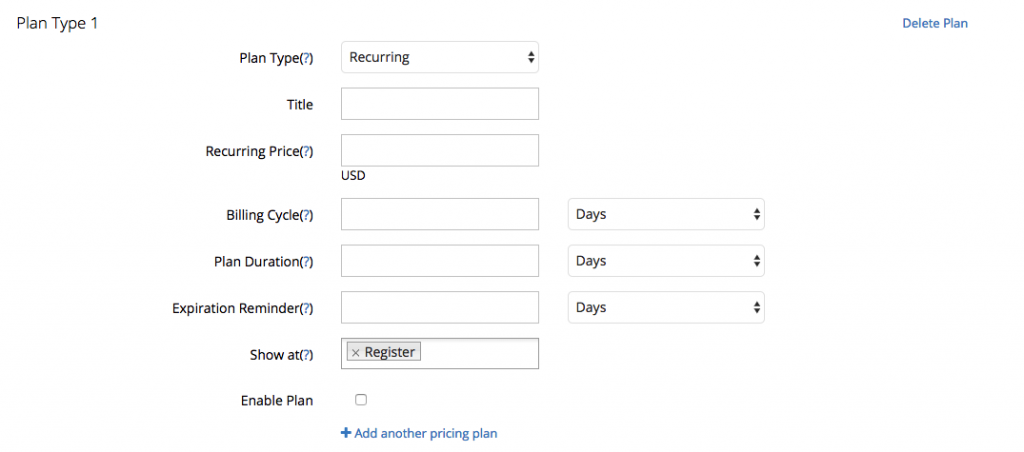
1. Select Recurring for plan type
2. Enter Plan Title
3. Enter Your Recurring Price
4. Enter Your Billing Cycle: Days, Months, Years
5 Enter Your Plan duration for the plan like 1 year, 6 months…
6 Enter Your Expiration Reminder (Remind user when their plan is about to expire)
7. Enter Show at
+ Registration: Show this plan on the sign-up page
+ Membership Page: Show this plan on the membership page
8. Enable Plan: tick/untick to enable/disable plan
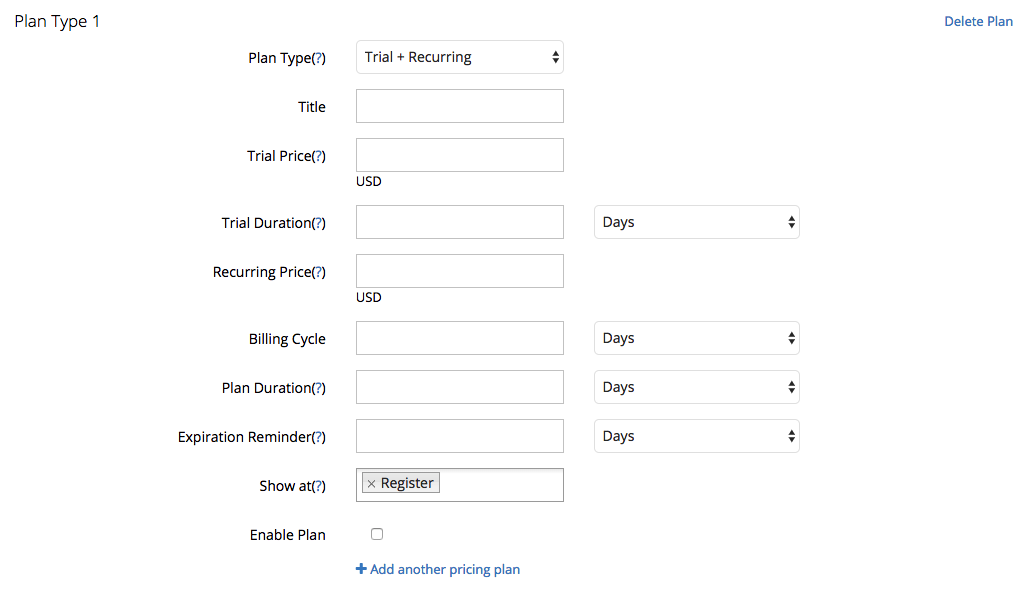
Trial + Recurring Plan Type
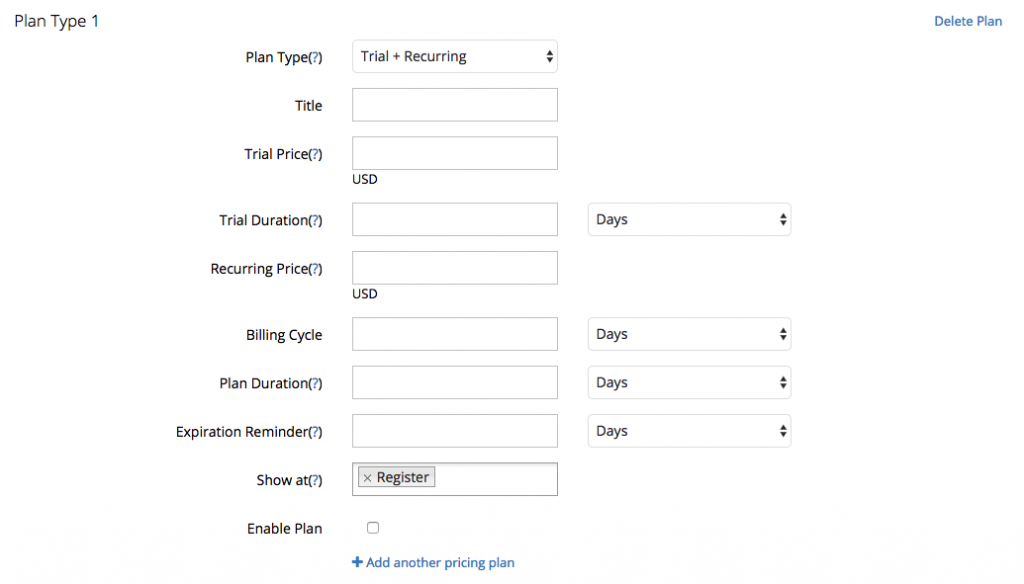
1. Select Trial + Recurring for plan type
2. Enter Plan Title
3. Enter Trial Price (0 for a free trial plan)
4. Enter Your Trial Duration (in days, months or years)
5. Enter Your Recurring Price
6. Enter Your Billing Cycle (in Days, Months, Years)
5 Enter Your Plan duration for the plan (in Days, Months, Years)
6 Enter Your Expiration Reminder (Remind user when their plan is about to expire)
7. Enter Show at
+ Registration: Show this plan on the sign-up page
+ Membership Page: Show this plan on the membership page
8. Enable Plan: tick/untick to enable/disable plan
Note: You can create multiple plans for 1 package. Once the plan was created, it cannot be edited. You have to delete and recreate it again.
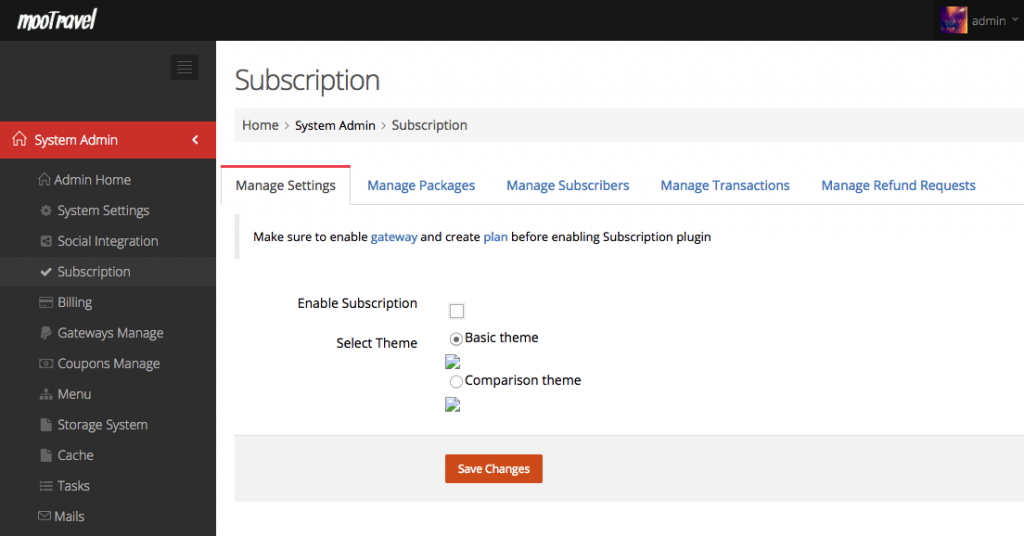
1. Login to the admin dashboard
2. Goto System Admin > Subscription > Manage Settings
3. Tick enable subscription checkbox to enable the subscription
4. Choose the subscription theme: basic or comparison table theme
There are three type of cache type: File, Memcache, Redis
File Cache
File cache is enabled by default
Memcache Cache Settings

1. Select Memcached from caching type
2. Enter Host Info
3. Enter Your Port Number
4. Enter Login and Password info
5. Tick/Untick if you want to compress the cache
Redis Cache Settings
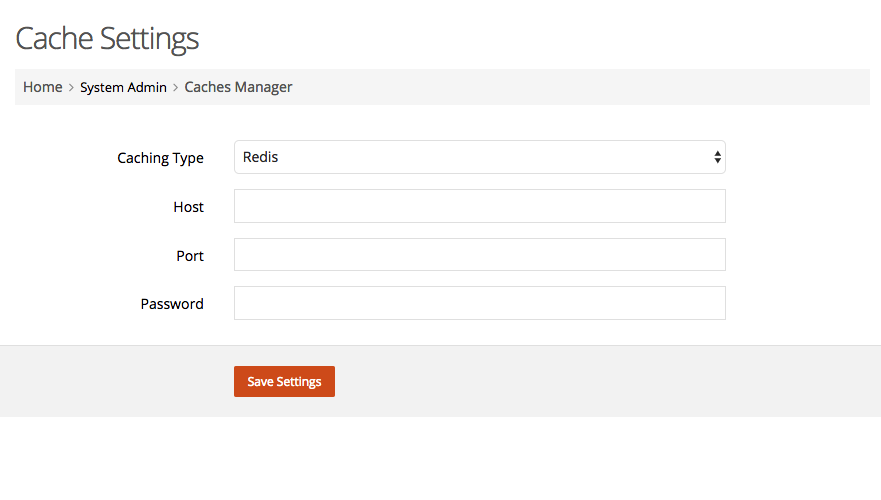
1. Enter Host Info
2. Enter Your Port Info
3. Enter Your Password for Redis settings